Butterfly Puddler – How to Make a Pollinator Water Station
Butterflies, bees, and other pollinators are so important to our gardens and food supply. And there are little things we gardeners can do to help them, like making a pollinator water station.
I happily attended the DIY Butterfly Puddler Workshop at Ken’s Gardens in Lancaster to make my own pollinator watering dish. This workshop brilliantly kicked off the company’s anniversary week.
The key idea is to give bees and butterflies a shallow dish from which they can drink as they perch on higher ground.
Shallower than a birdbath, the butterfly water dish offers different levels within for perching.
I really like the name they used for the project – butterfly puddler. It brings to mind visions of puddles, which would allow for easy and safe sipping.
Here’s my review of the workshop I attended along with easy instructions to create your own pollinator watering station!
What is a butterfly puddler?
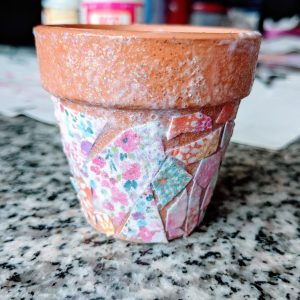
A butterfly puddler is a drinking station for pollinators like butterflies and bees. You can make your own pollinator drinking dish with a saucer, clear caulk, and a variety of small ceramic tiles, stones, or other adornments. Grout is optional!
What do pollinators need?
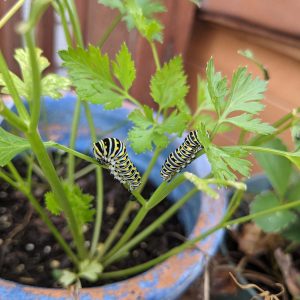
In general, pollinators need access to their preferred food supply as well as water and shelter. Pollinators like butterflies also need access to host plants like milkweed for Monarchs and dill, parsley, or carrots for black swallowtail butterflies.
Growing native plants is a great way to help pollinators. Also, avoid using pesticides that can diminish their populations.
How do you make a pollinator water station?
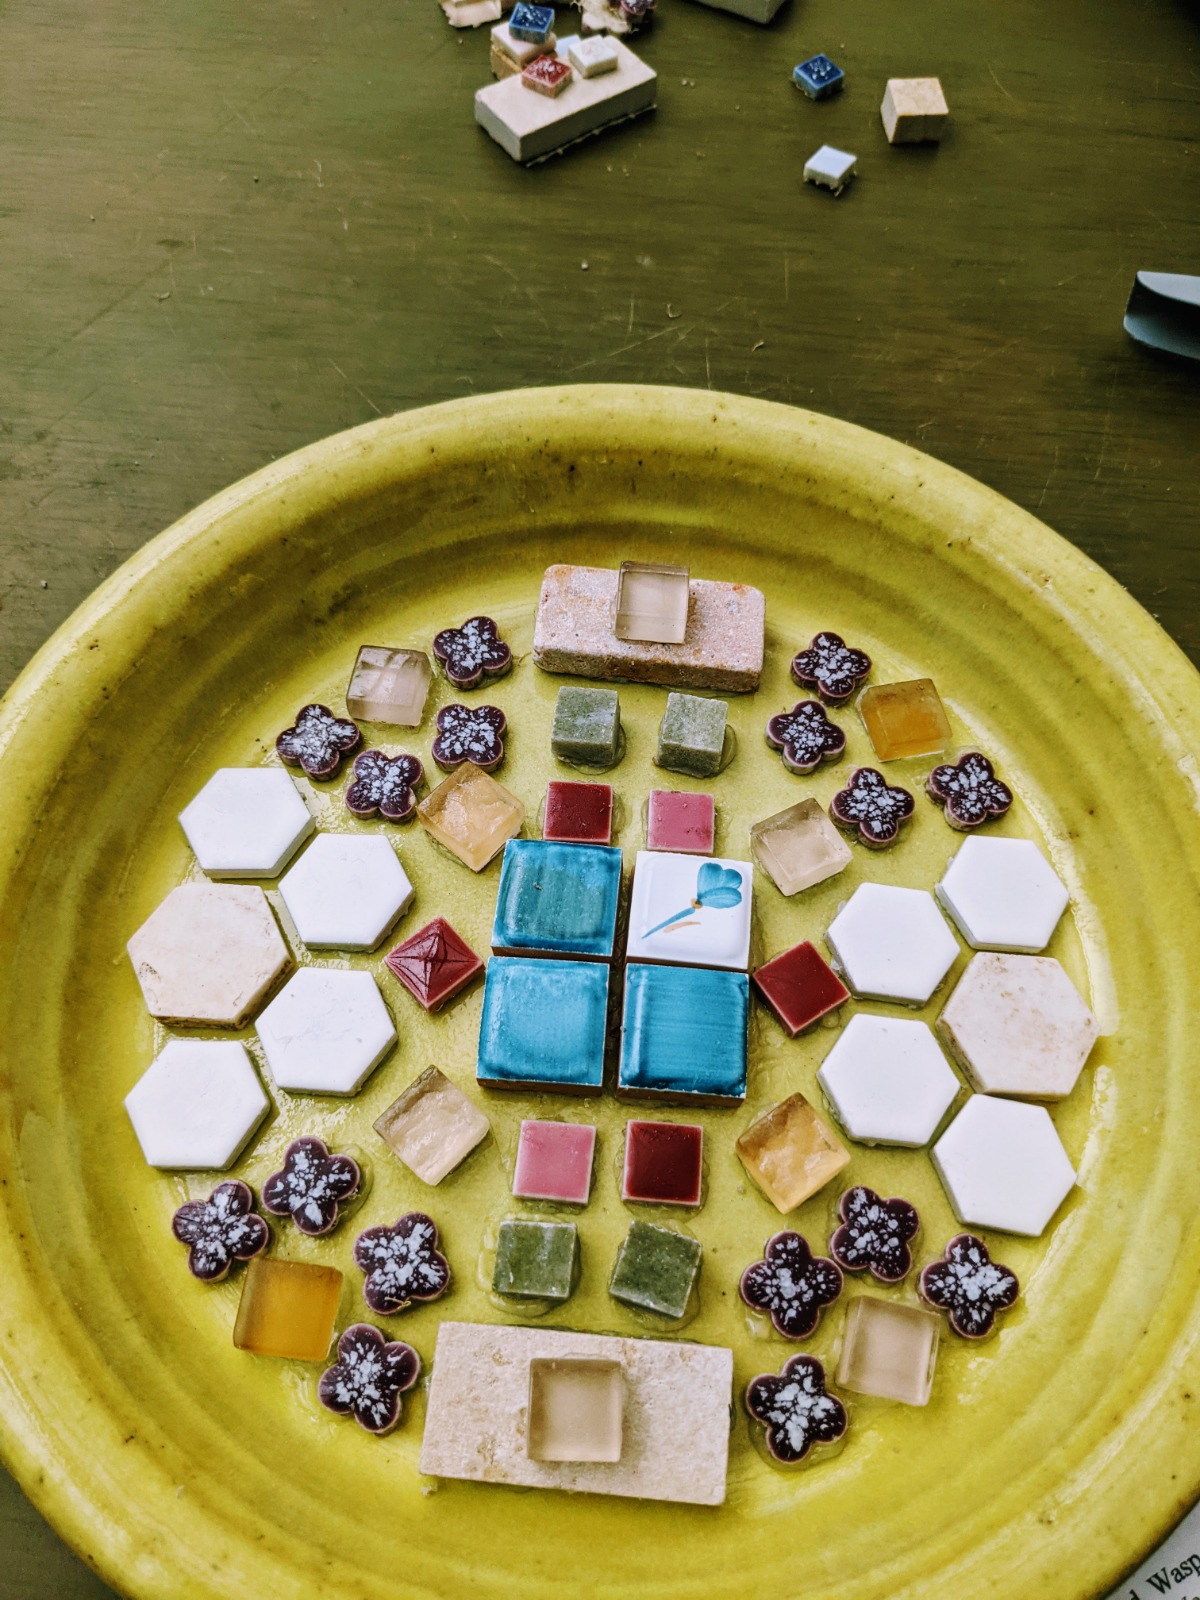
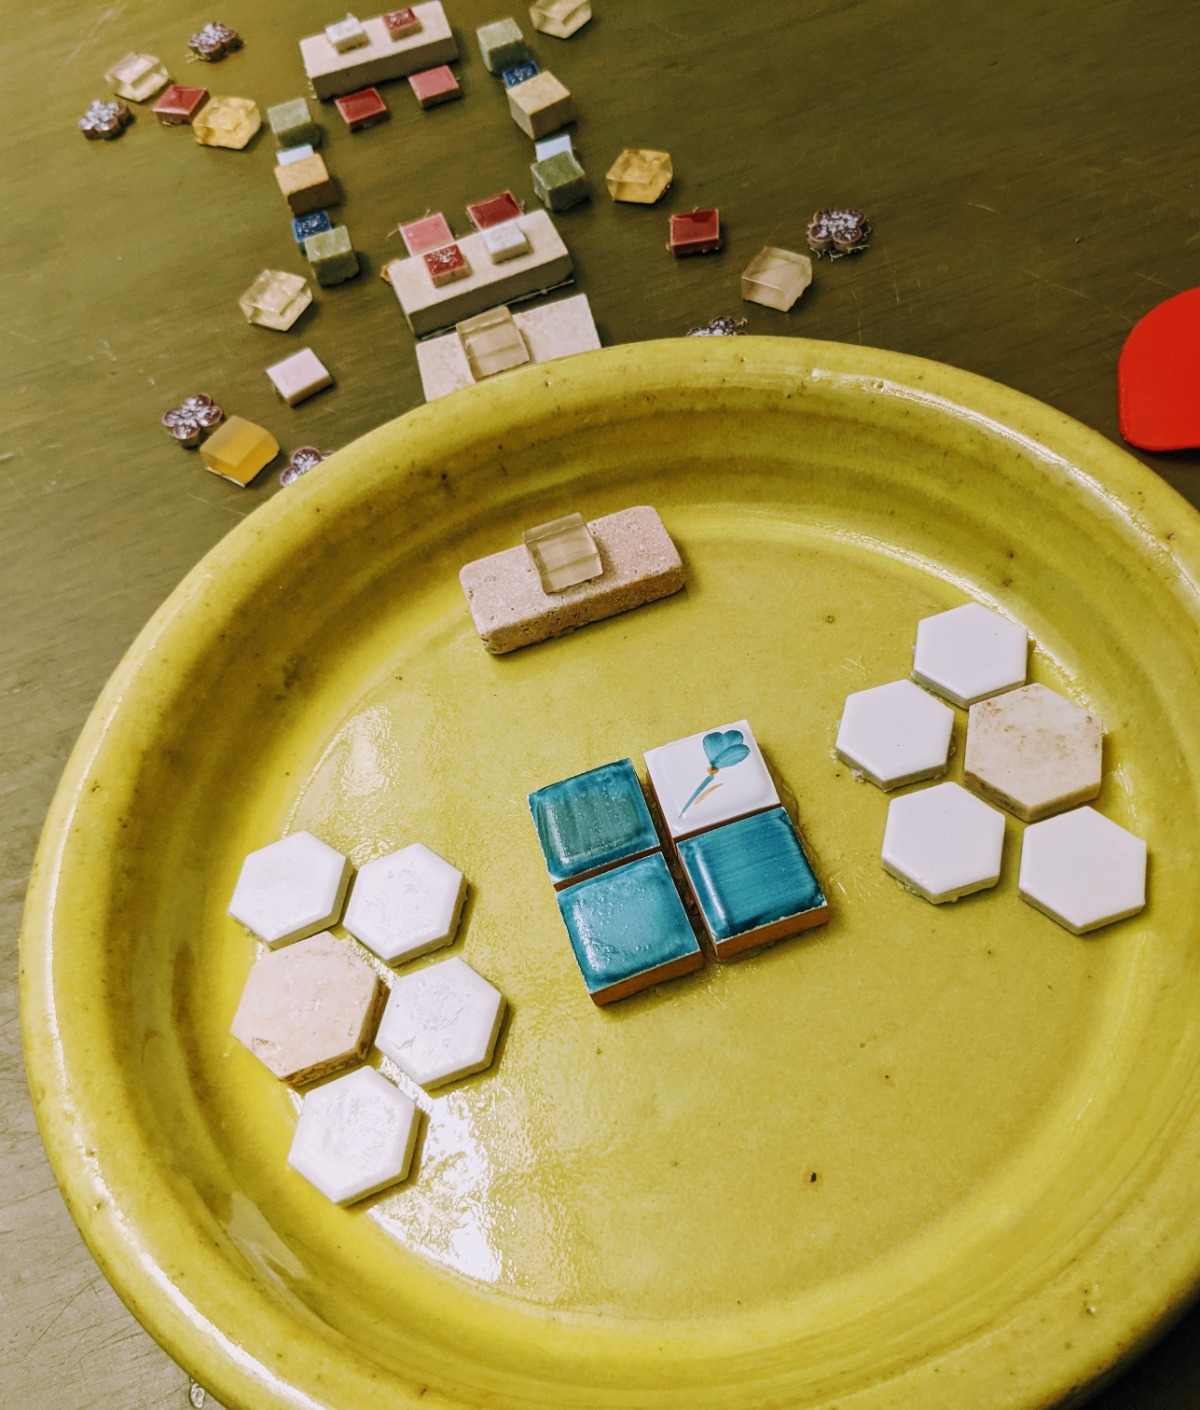
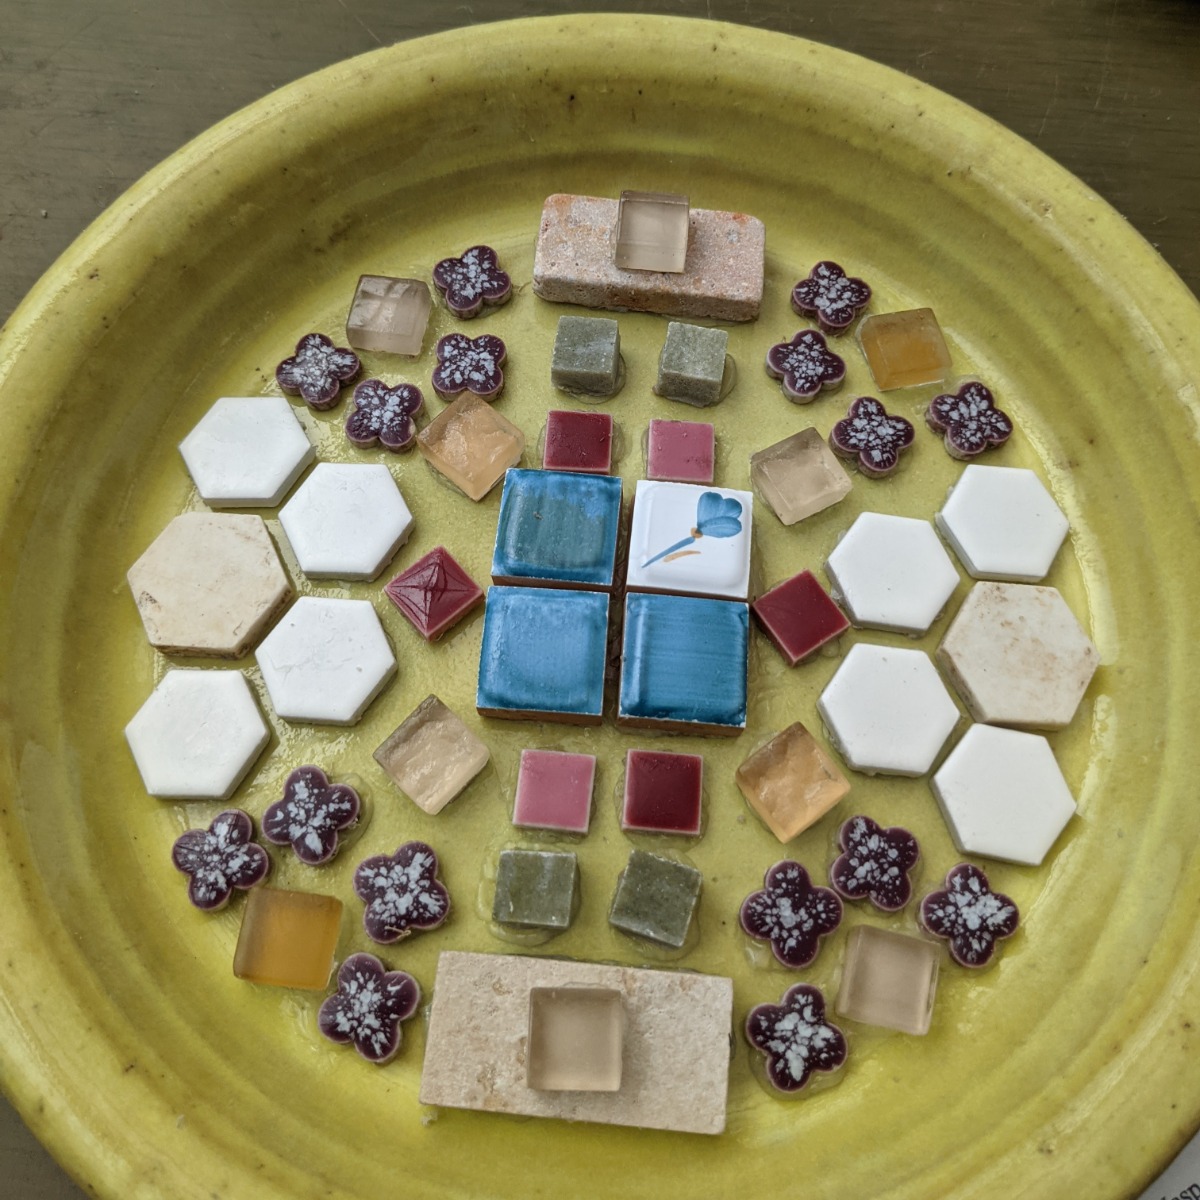
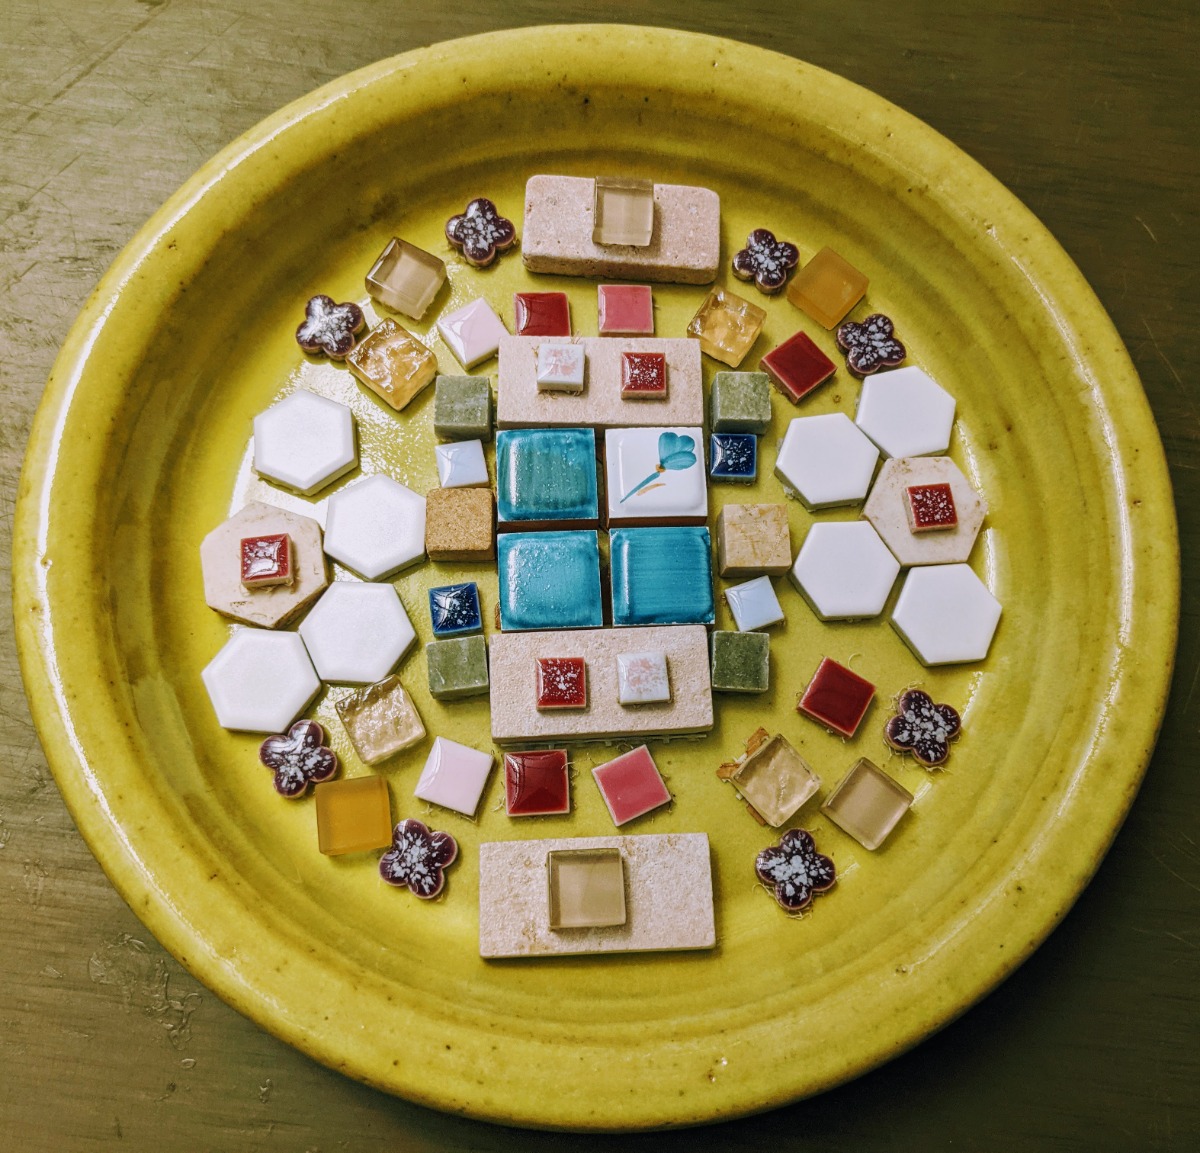
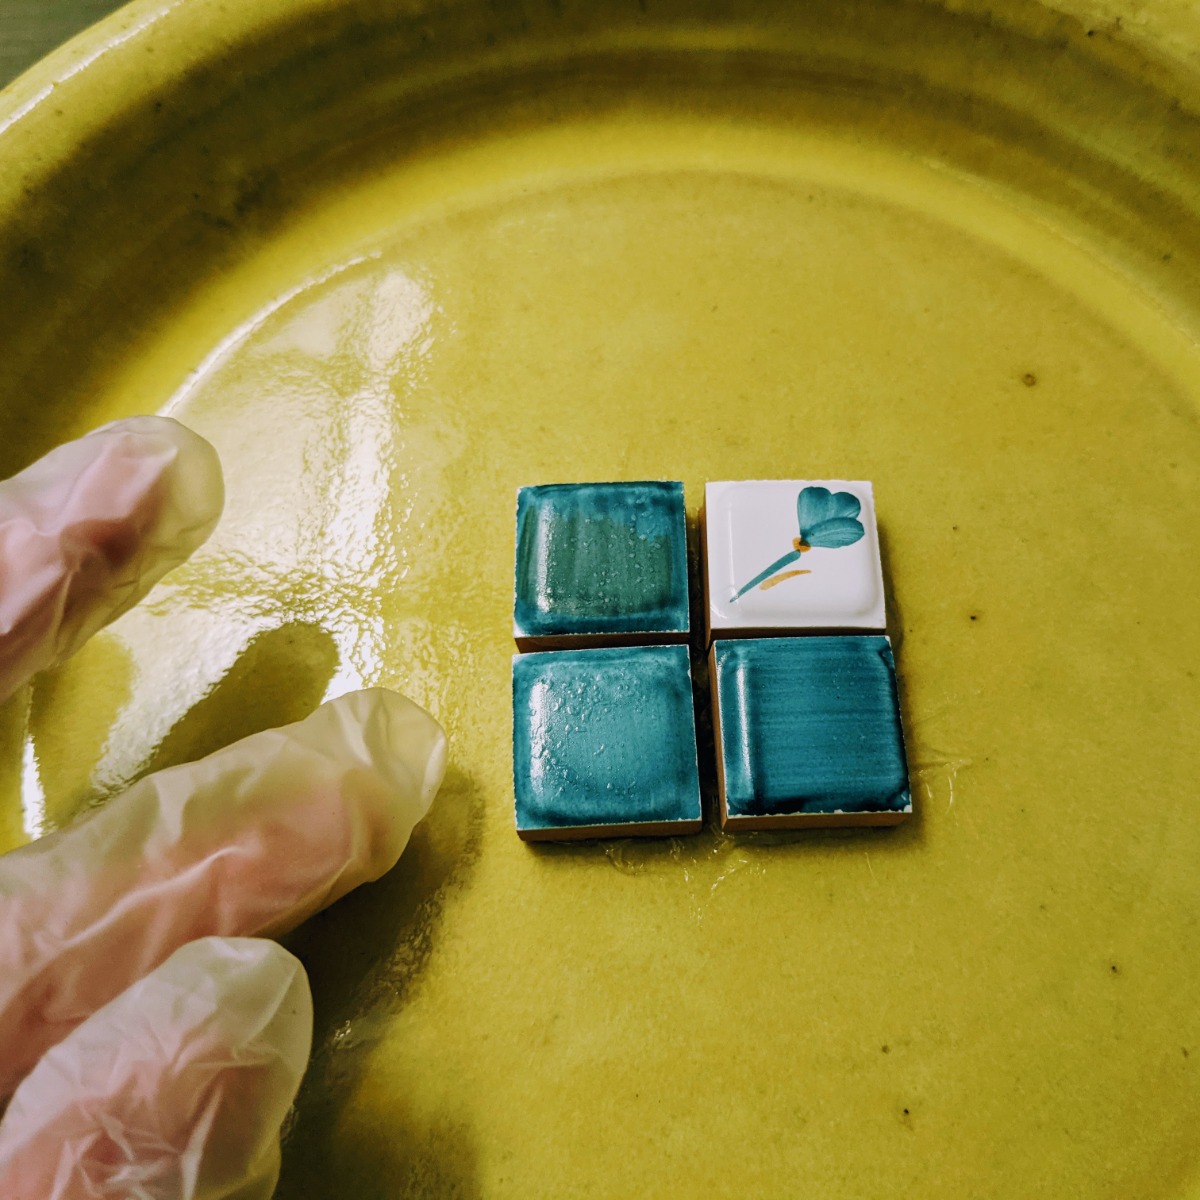
You can make your own pollinator watering station as an upcycling project! Gather a saucer from a planter or otherwise, along with clear silicone caulk and a variety of small, decorative ceramic tiles. You will use the caulk to affix the adornments to the face of the dish and create a pattern or design that you love.
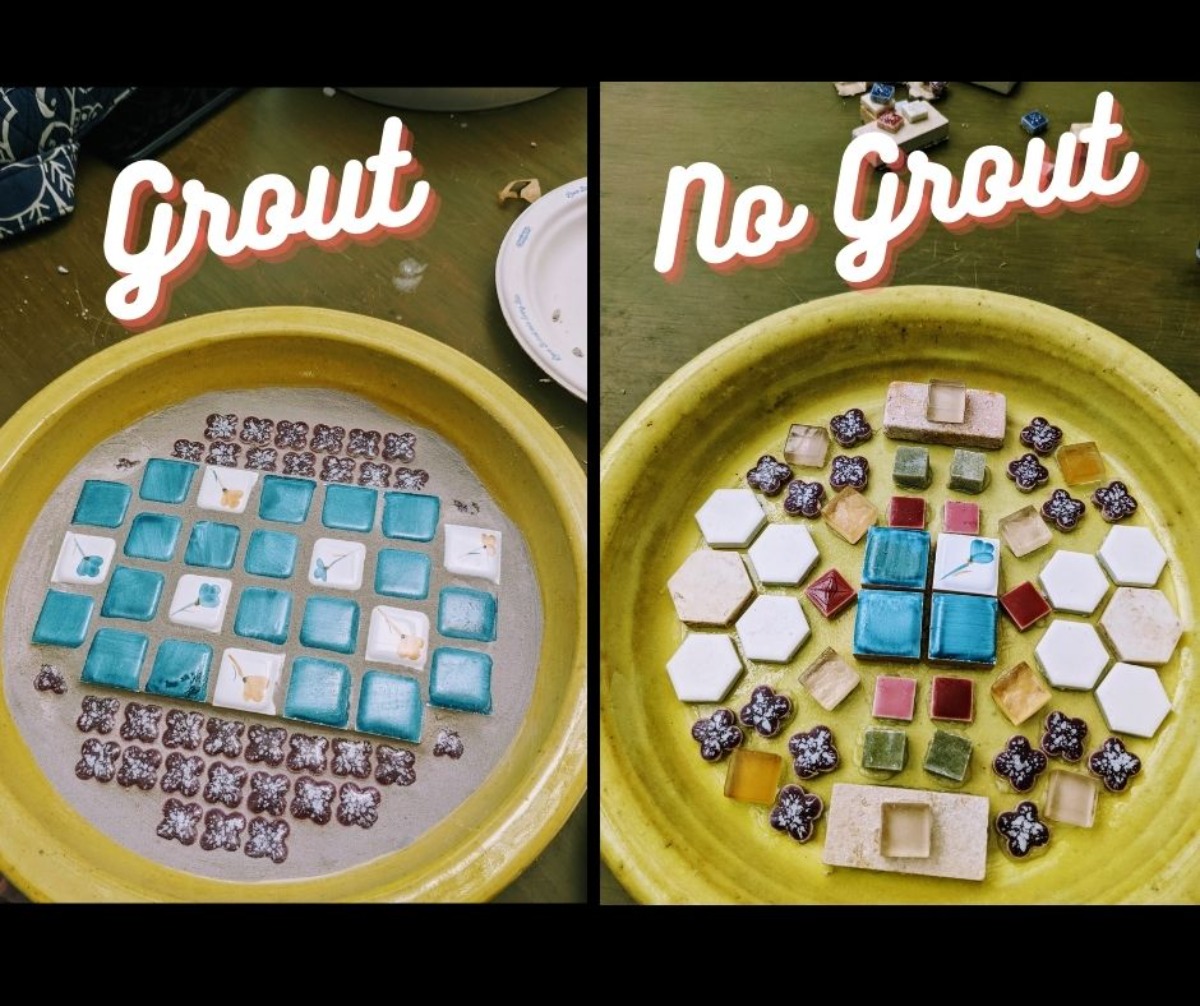
Choose to fill in the cracks with grout or leave it open to allow water to flow between the cracks.
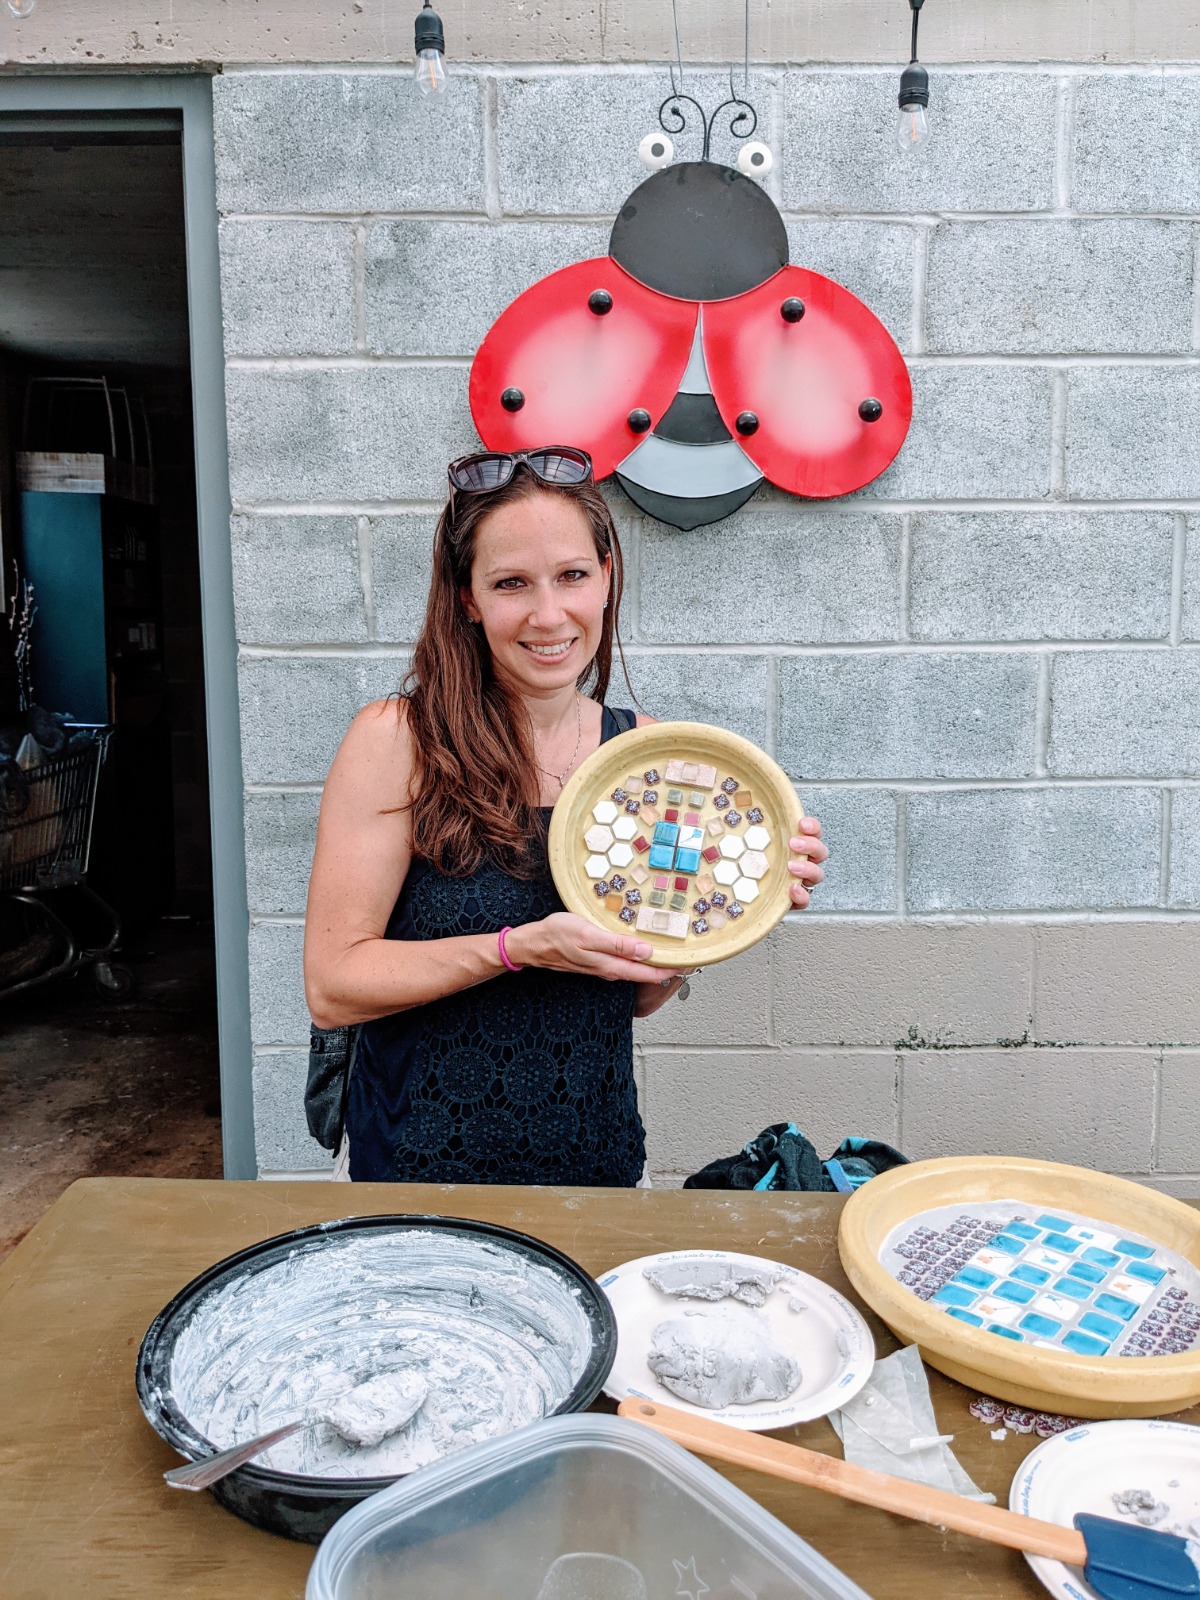
DIY Butterfly Puddler Pollinator Water Station
This project worked out amazing and took about an hour and a half for most participants.
By the way – you can even get the kids involved in making their own butterfly and bee puddlers with your supervision.
Make a beautiful and timeless pollinator water dish with these simple steps!
Butterfly & Bee Puddler Materials
Our website features affiliate links to products that we personally believe in. If you make a purchase from a link on our site, we may earn a small commission at no cost to you. Thank you! This helps our girls chase their garden dreams! Thanks for your support. (View full affiliate disclaimer at the end of the page.)
Gather these materials to make your own butterfly and bee watering dish.
How to Make a Pollinator Water Station
Use the materials above and give yourself an hour or so to complete this awesome pollinator-focused project.
- Start with a clean plant saucer or other dish.
- Create a pattern or design you like using a variety of decorative tiles. Simply arrange the tiles freely on top of the plate.
- Once you are happy with your design, sit at a table and move your design from the plate to the table surface.
- Apply clear silicone caulk to the face of the plate in one area. I started with my most important tiles first. (I caulked the center tiles first and then my 12 o’clock, 3 o’clock, 6 o’clock, and 9 o’clock designs.)

- Do a little bit at a time, gluing down each small design pairing before moving to the next. Work evenly and focus on spacing and alignment.
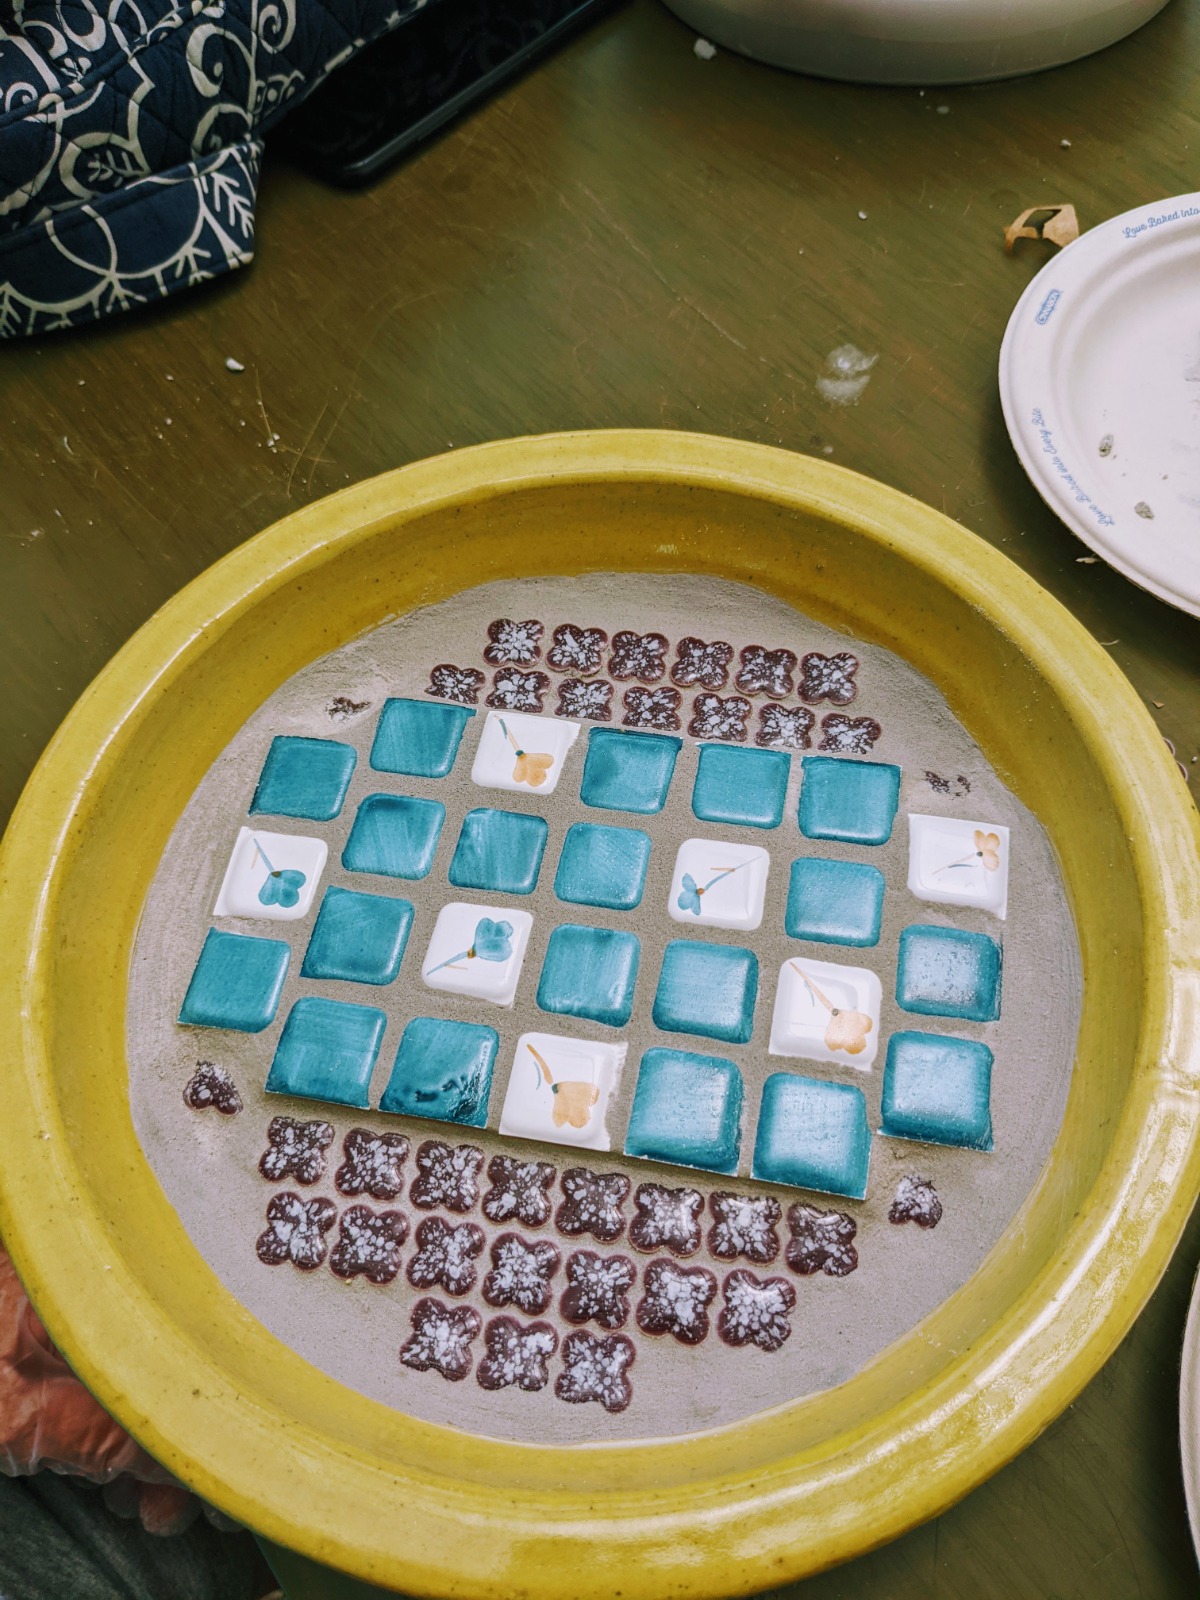
- Mix up grout and fill in the gaps if you wish. I did not do grout on mine, but my new gardening friend Lola did on hers and it looks awesome! If you use grout, be sure to use a wet sponge to clean off the tiles after filling in the cracks.
- Allow the dish to dry completely before adding any water inside. Most grout cures in 24 to 72 hours – I would always err on the side of caution with something like this.

Of course, if you’d like to buy an already-made pollinator puddler / drinking station, you can find some of those, too!
Tips for Making a Pollinator Water Dish
When making a drinking dish for pollinators, let your creativity guide you.
- Tiles – Choose any variety of colors, shapes, and textures for your butterfly puddler. I loved adding some translucent chunks along with the more stone-like tiles.
- Heights – Create different levels within your dish for easy perching.
- Grout – Choose to use grout or leave your tiles exposed for maximum impact – it’s up to you!
- Focus – Affix the most important elements first, such as the largest pieces, the center, and those pieces directly across from each other.
- Symbolism – Create designs within a design if you like. I made half-flower designs that also resemble honeycombs!
- Symmetry – Go for symmetry if you like or go totally abstract – this is your own creation!
My new gardening friend Lola Seymour of Millersville said it was her very first time making something like this. And here the whole class I’d been admiring her work, inspired by her creative approach and thinking she’d done it a dozen times!

She did a really amazing job! And Lola so kindly allowed me to take her photo for the blog as well as a picture of the pollinator dish she created. (THANKS LOLA!)
Here you can see the difference of with grout vs without!
If you ever have the opportunity to attend a workshop like this, I highly recommend it.
And if not, what’s stopping you?! This project is absolutely easy enough to do at home solo or with friends or family.
More about Ken’s Gardens
Ken’s Gardens in Lancaster hosted this workshop as part of its 50th Anniversary Celebration. This was my first time visiting Ken’s and it won’t be my last.
Just wanted to give a huge shout out to Ken’s Gardens and our workshop lead Kristy (spelling?) who guided us in each step of making the pollinator water station.
You can find even more anniversary specials and events at both Ken’s Gardens locations.